Before You Get Started
If you have never worked with HTML or JavaScript and don't know much about programming, you can take a look at the slides from our first jsPsych workshop part 1, part 2, Gitlab repo. The slides include a short crash course on JavaScript. This tutorial assumes that you know at least the very basics, like how a variable is defined and how strings and arrays work.
The slides for both our jsPsych workshops offer a lot of information, not all of which will be included in this tutorial. So if you are looking for more details, you might find them in there.
Getting Started
Open the code editor of your choice (e.g. Visual Studio Code), create an HTML file and add the following:
                                        <!DOCTYPE html>

                                        <html>

                                            <head>

                                                <title>jsPsych experiment template</title>

                                                <script src="https://unpkg.com/jspsych@8.2.1"></script>

                                                <link href="https://unpkg.com/jspsych@8.2.1/css/jspsych.css" rel="stylesheet" type="text/css" />

                                                <!-- Add any plugins you want to use here -->

                                            </head>

                                            <body></body>

                                            <script>

                                                const jsPsych = initJsPsych();

                                                const timeline = [];


                                                // Add your code here.


                                                jsPsych.run(timeline);

                                            </script>

                                        </html>
You can also use this template.
Initializing jsPsych
The first thing that needs to be done in any jsPsych experiment is initializing jsPsych. This is done by adding `const jsPsych = initJsPsych();` as the first line of the `<script>` section and is already included in the template above.
Inside the brackets of `initJsPsych()` is also where you can define more general things like where to send the data at the end of the experiment. To specify what happens after the experiment finishes, add the `on_finish` parameter. To display the collected data after the experiment, use the `jsPsych.data.displayData()` function. The data are displayed directly in your browser and are in JSON format by default. This is great for testing, as it allows you to see what data are collected without needing to save them, but should generally be removed before deploying your experiment.
                                        // initialize jsPsych

                                        const jsPsych = initJsPsych({

                                            on_finish: function() {

                                                // display collected data after the experiment

                                                jsPsych.data.displayData();

                                            }

                                        });
The Timeline
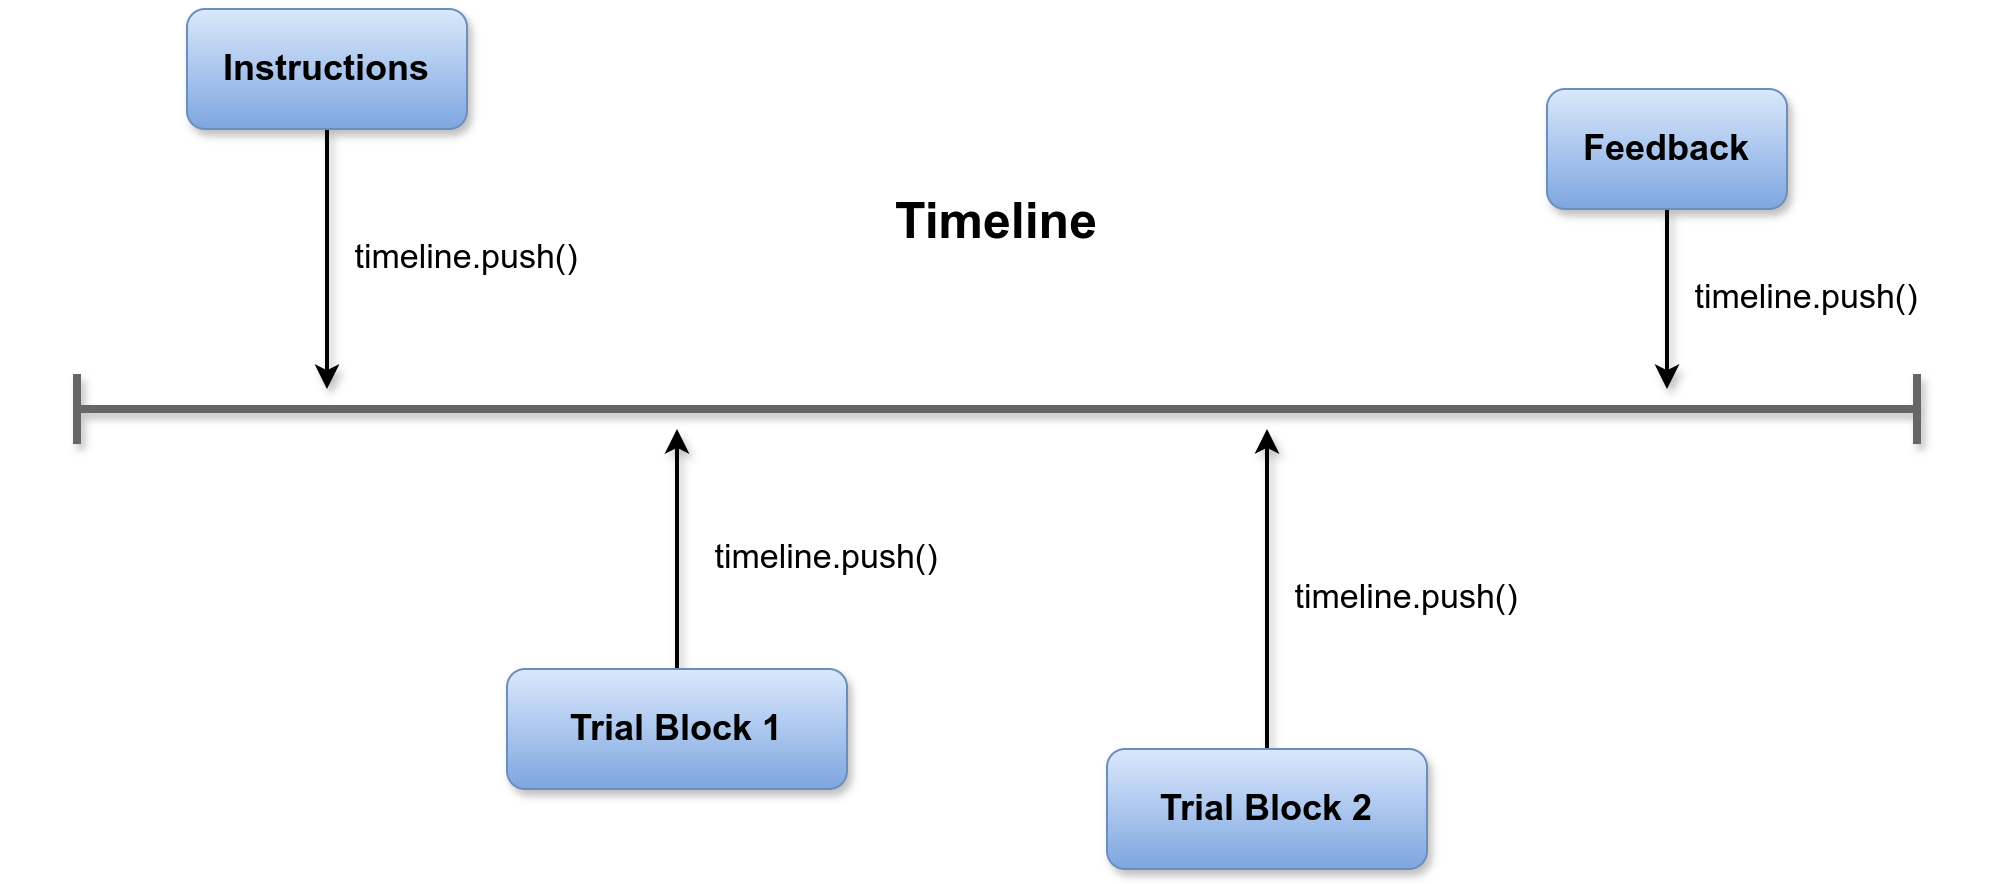
Like in other software for creating experiments, jsPsych uses a timeline to determine the order of events in the experiment. In jsPsych this timeline takes the form of an array of objects. The timeline is conventionally called 'timeline' and created right after initializing jsPsych by writing `const timeline = [];` (also included in the above template).
Essentially, the experiment at this point looks like this:
![]()
Trials
What you have created so far is basically an experiment with nothing in it. To fill it with content you have to create 'trials'. A trial in jsPsych is a block of content, be it a set of instructions, feedback or an experimental trial. These trials consist of an object, denoted by curly braces, with parameters that is assigned to a variable. In practice it can look like this:
                                        const instructions = {

                                            type: jsPsychHtmlKeyboardResponse,

                                            stimulus: 'Please press any key.'

                                        };
The exact name that is needed for the `type` parameter is usually composed of 'jsPsych' plus the plugin's name in camel case and can be looked up in the documentation
The documentation for each plugin also has a list of parameters that can be used. In the above example the `stimulus` parameter takes text that will be displayed as HTML on screen in the experiment.
>***IMPORTANT!*** Any time you use a new plugin in the experiment, that plugin needs to be included in the `<head>`. Otherwise, jsPsych won't know what to do with that trial and if you run the experiment, the browser's console will show an error like this:

What you need to write to include a plugin can be found in each plugin's documentation under 'Install'. In case of the HtmlKeyboardResponse plugin, you need to add the following:
<script src="https://unpkg.com/@jspsych/plugin-html-keyboard-response@2.1.0"></script>
With the additions the template now looks like this:
                                        <!DOCTYPE html>

                                        <html>

                                            <head>

                                                <title>jsPsych experiment template</title>

                                                <script src="https://unpkg.com/jspsych@8.2.1"></script>

                                                <link href="https://unpkg.com/jspsych@8.2.1/css/jspsych.css" rel="stylesheet" type="text/css" />

                                                <!-- Add any plugins you want to use here -->

                                                <script src="https://unpkg.com/@jspsych/plugin-html-keyboard-response@2.1.0"></script>

                                            </head>

                                            <body></body>

                                            <script>

                                                const jsPsych = initJsPsych();

                                                const timeline = [];


                                                // Add your code here.

                                                const instructions = {

                                                    type: jsPsychHtmlKeyboardResponse,

                                                    stimulus: 'Please press any key.'

                                                };


                                                jsPsych.run(timeline);

                                            </script>

                                        </html>
Adding Trials to the Timeline
Even though there is now a trial in the experiment, it doesn't show up when you run the experiment. That is because it isn't yet on the timeline. To put trials on the timeline they need to be pushed onto it with the `.push()` method.
To push the 'instructions' trial from before onto the timeline you would write:
timeline.push(instructions)
It doesn't matter where in your code you put the statement as long as it is after you have defined the trial and before the timeline is run. What does matter is the order of different push statements; a trial is always pushed on the end of the timeline, so you need to put them in the correct order. It is often easiest to first define all your trials and then put all push statements after them; that way you can easily order and re-order them and it is easier to keep track of them.
Running the Timeline
To actually execute the timeline when the experiment is opened, there needs to be a `jsPsych.run(timeline);` statement at the end of your `<script>`. This is already included in the template above.
Trial Loops
When creating an experiment, you usually have experimental items that all need to be presented in the same way. It would be inefficient to make a seperate trial for each item. To make things easier you can create a simple experimental loop that will iterate over a list of your items and present each to the participant in the same manner.
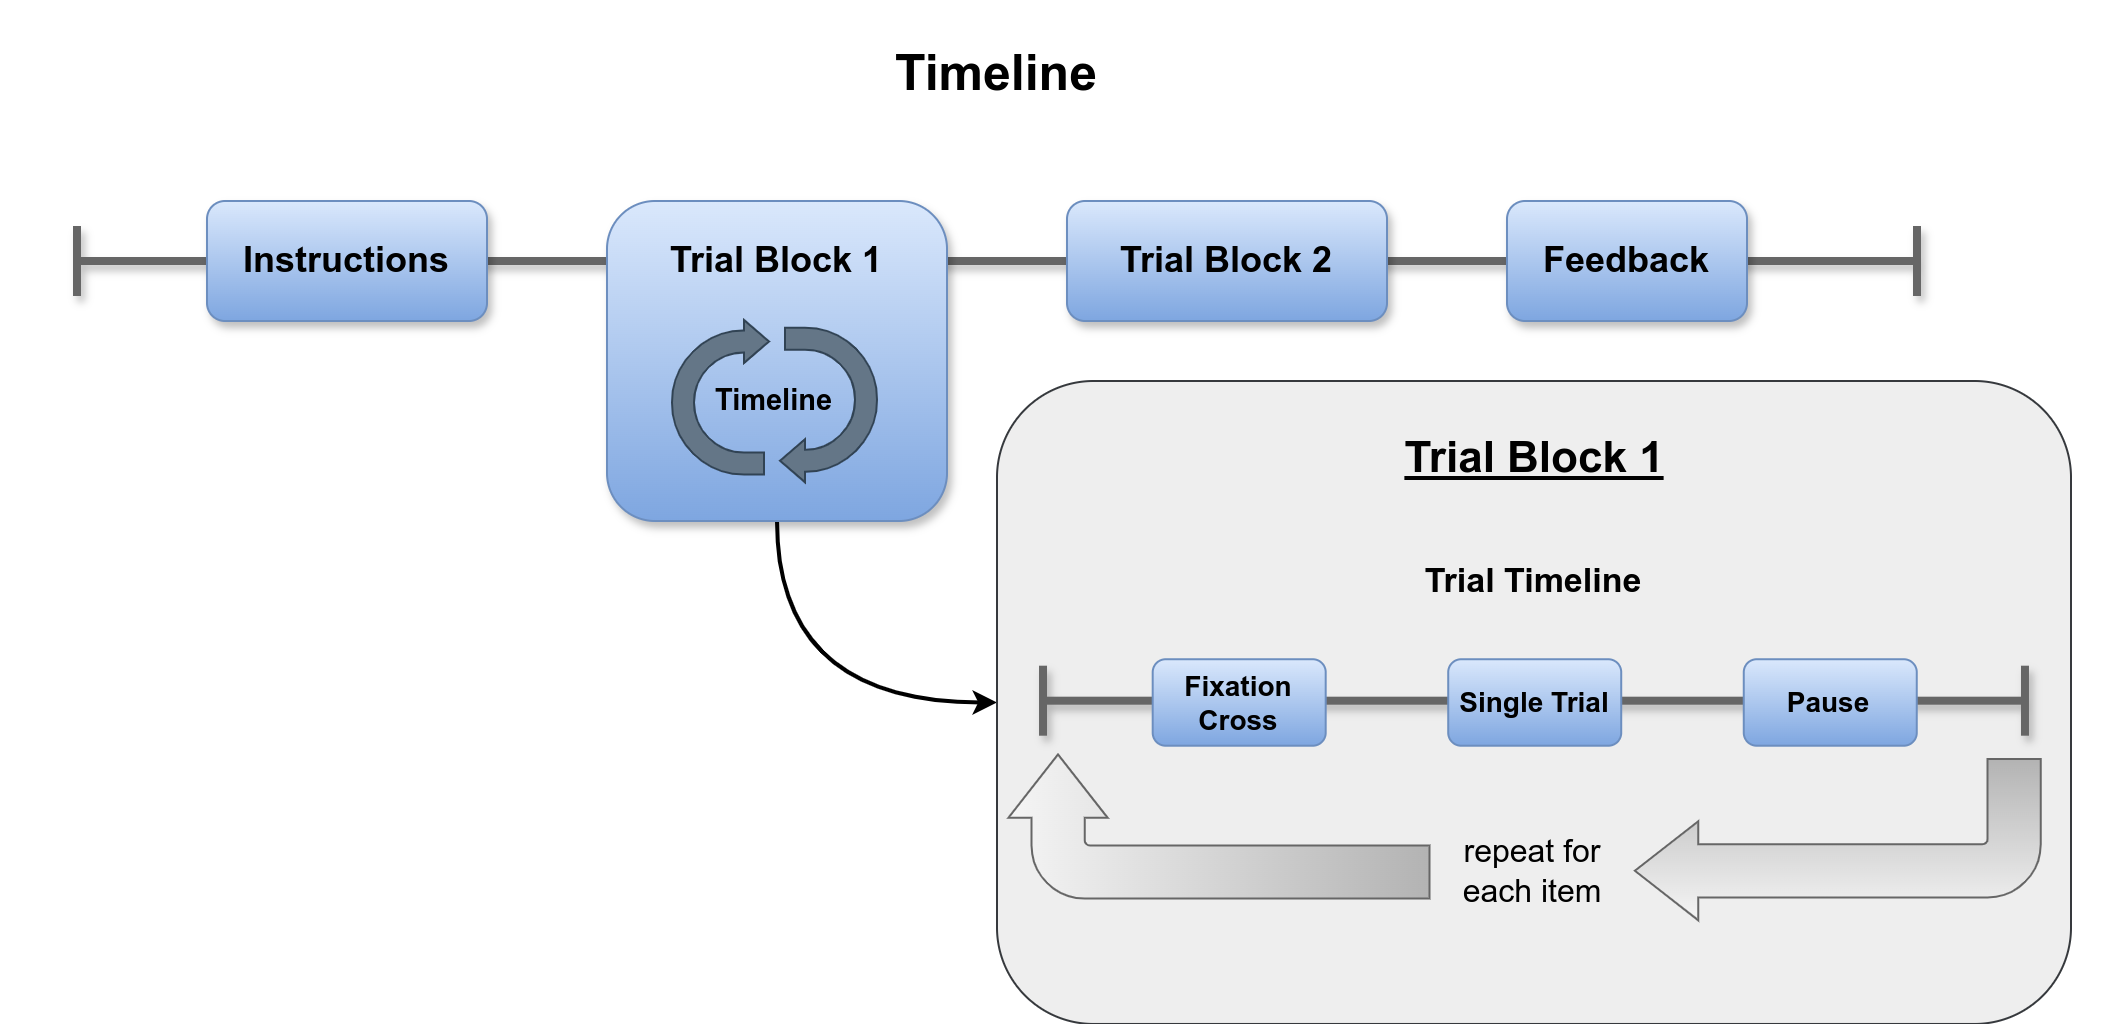
To create such a loop in jsPsych, you basically create an internal timeline and specify a list of timeline variables to iterate over. In jsPsych it would something look like this:
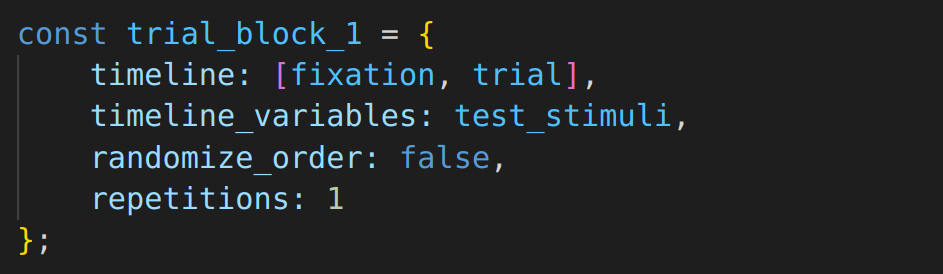
- `timeline_variables` specifies the list of stimuli to iterate over.
- `timeline` takes an array of trials that will be executed on each iteration.
- `randomize_order` determines if the items will be presented in the order they appear in in the list, or randomized.
- `repetitions` determines how many times to repeat the entire list of items.
For the trial block to work the experiment also needs the trials `fixation` and `trial`:
- `fixation` displays a simple fixation cross with the jsPsychHtmlKeyboardResponse plugin.
- `trial` also uses the jsPsychHtmlKeyboardResponse plugin to display the current stimulus. To access the current timeline variable, you use `jsPsych.timelineVariable()`.
You can add the following to your template experiment:
                                        const fixation = {

                                            type: jsPsychHtmlKeyboardResponse,

                                            stimulus: '<tt style="font-size:4em";>+</tt>',

                                            choices: "NO_KEYS",

                                            trial_duration: 395,

                                            record_data: false

                                        };


                                        const trial = {

                                            type: jsPsychHtmlKeyboardResponse,

                                            stimulus: jsPsych.timelineVariable('target'),

                                            choices: ['f', 'j'],

                                            trial_duration: 1500,

                                            post_trial_gap: 395

                                        };


                                        const trial_block_1 = {

                                            timeline: [fixation, trial],

                                            timeline_variables: test_stimuli,

                                            randomize_order: false,

                                            repetitions: 1

                                        };
- `choices` determines which key presses will be accepted as a response; all other key presses will be ignored. It takes a single key name or an array of key names (a list of names can be found here . If omitted, all keys will be accepted. 'NO_KEYS' means that there are no valid key presses and the trial will last until the trial duration runs out.
- `trial_duration` defines how long a trial will last in milliseconds. If not specified otherwise, a trial will also end when a valid key is pressed.
- `post_trial_gap` determines how long to wait in milliseconds before the next trial begins.
- `record_data` determines if data should be recorded. This parameter is `true` by default and only needs to be specified for trials you don't need data from. This parameter was added in jsPsych version 8 and won't work in older versions.
Don't forget to push `trial_block_1` to the timeline:
timeline.push(trial_block_1)
Items
Now you have an experimental loop for your experiment, but you're still missing items to iterate over. An item list in jsPsych is an array of objects that can look like this:
                                        const test_stimuli = [

                                            { target: 'ORDAN', condition: 'pw', correct_response: 'j' },

                                            { target: 'NEFFE', condition: 'word', correct_response: 'f' },

                                            { target: 'KERZE', condition: 'word', correct_response: 'f' },

                                            { target: 'AMBIS', condition: 'pw', correct_response: 'j' }

                                        ];
Data
If you open the experiment in a browser it should now run and ask you to press any key before showing the four items and end with showing the recorded data in JSON format:
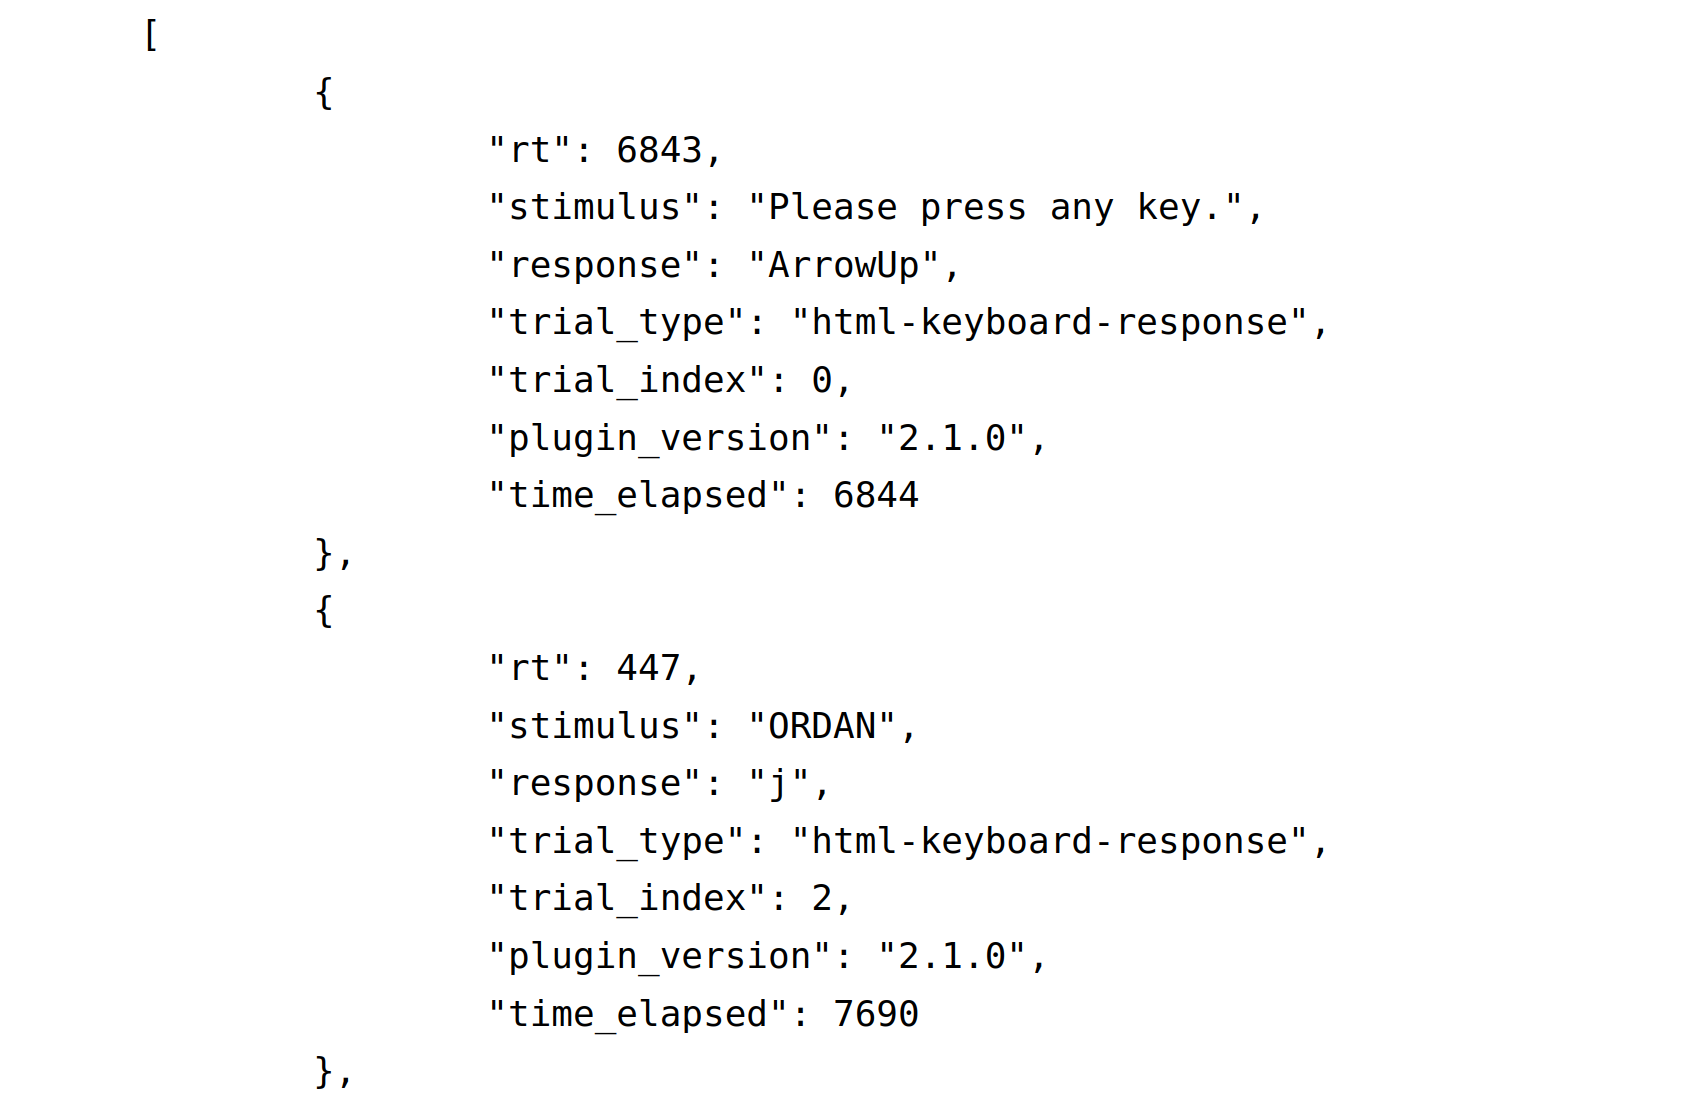
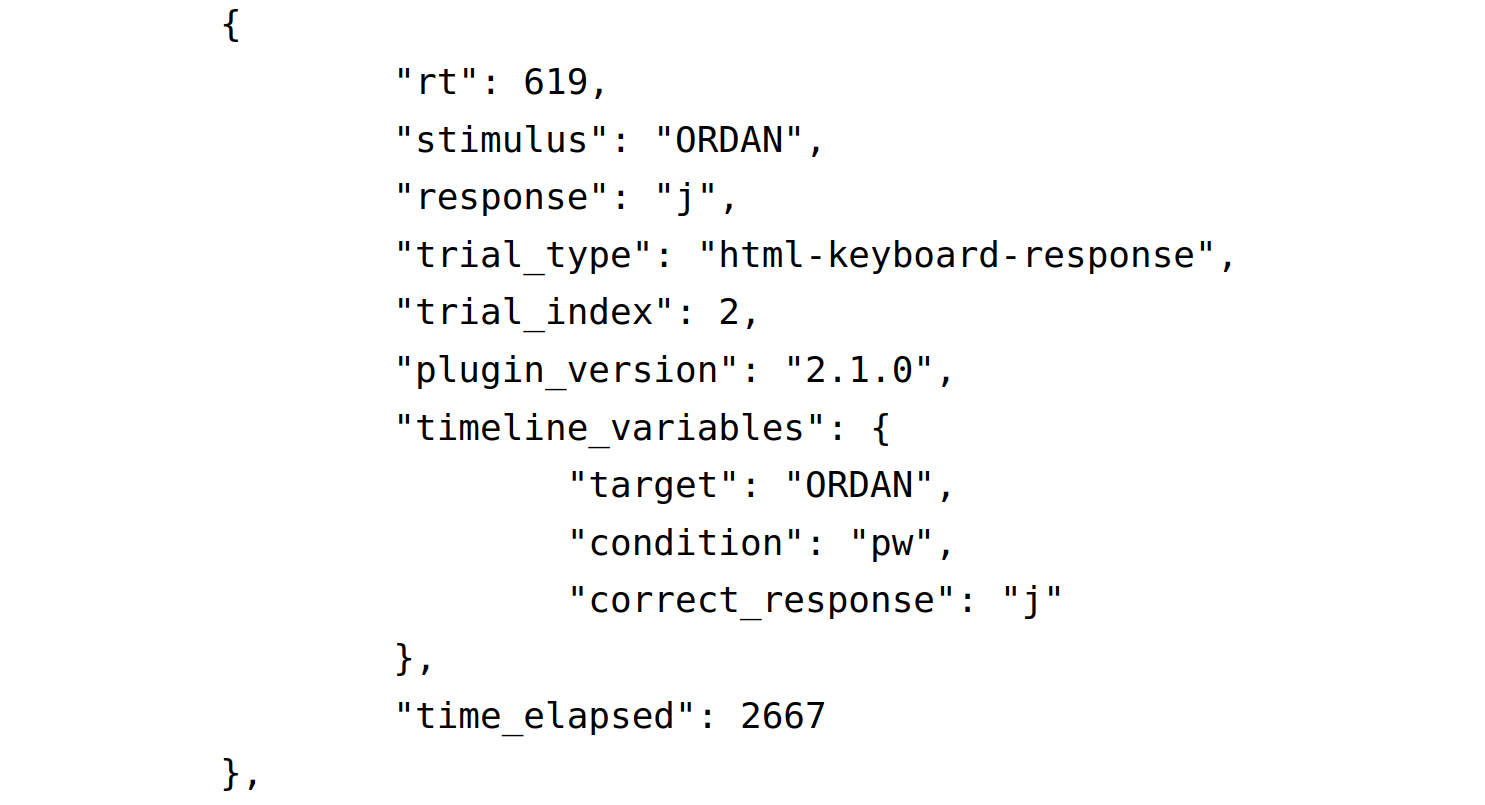
Reaction time is recorded under 'rt', the stimulus under 'stimulus', and the key that was pressed under 'response'. There is also some information about the plugin that was used etc. What isn't being recorded are the other properties from the item list: 'condition' and 'correct_response'. Since jsPsych version 8 there is the `save_timeline_variables` parameter: If set to true, all timeline variables will be recorded. However, the whole object is being saved, which means in a CSV file everything in the curly braces will appear as an object in the same column and in a JSON file as follows:
Depending on how you want to analyze your data this format might not be ideal. Another way to save data from your timeline variables is using the `data` parameter:
                                        const trial = {

                                            type: jsPsychHtmlKeyboardResponse,

                                            stimulus: jsPsych.timelineVariable('target'),

                                            choices: ['f', 'j'],

                                            trial_duration: 1500,

                                            post_trial_gap: 395,

                                            data: {

                                                task: 'trial',

                                                target: jsPsych.timelineVariable('target'),

                                                condition: jsPsych.timelineVariable('condition'),

                                                correct_response: jsPsych.timelineVariable('correct_response')

                                            }

                                        };
The on_finish Parameter
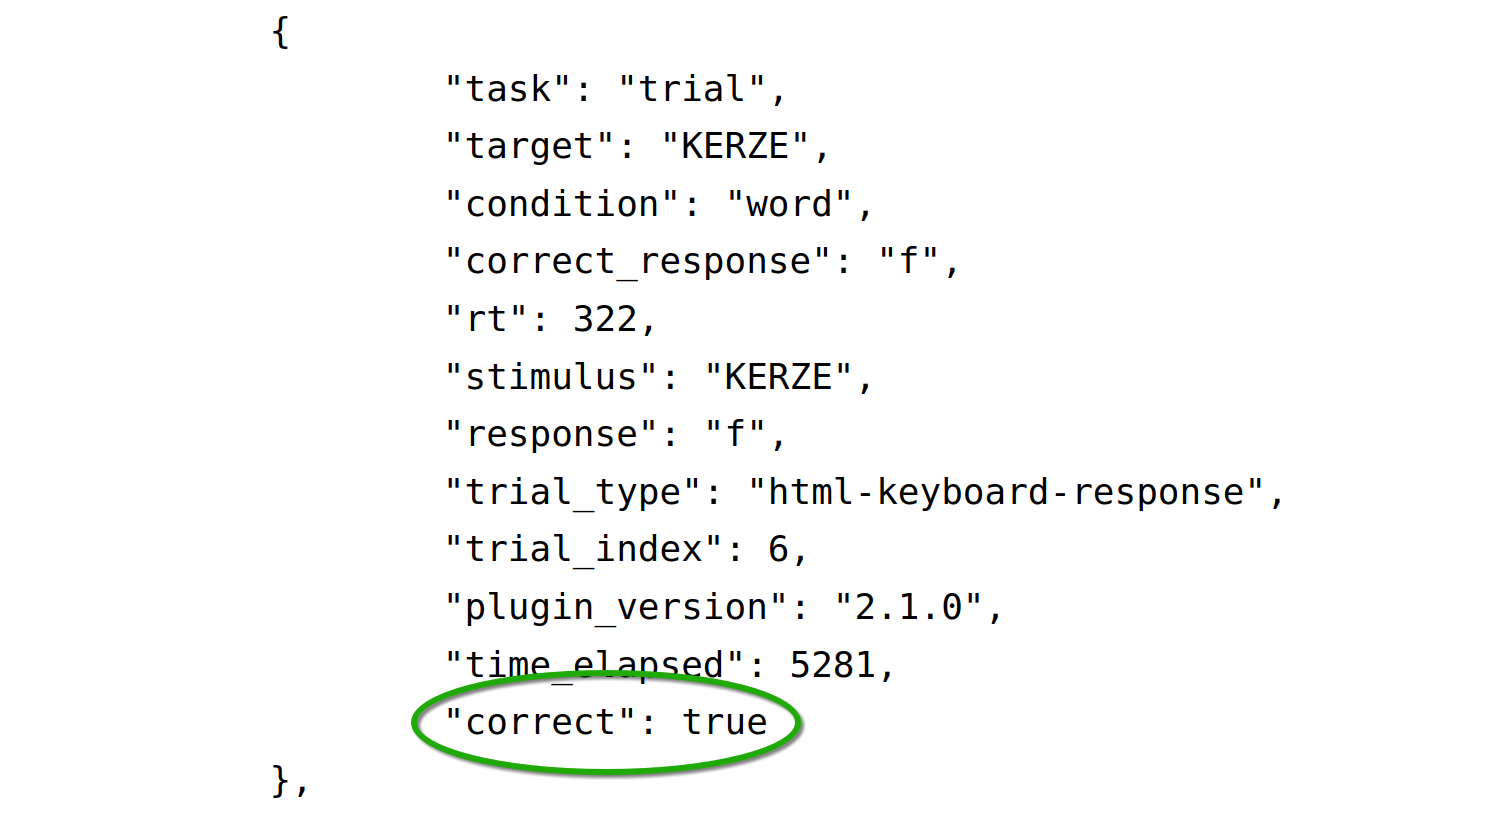
You already know `on_finish` from Initializing jsPsych , but it can also be added to normal trials. This is usful for example, if you want to analyze the collected data before moving on. In practice this is often used to check if a participant answered correctly and save the result:
                                        const trial = {

                                            type: jsPsychHtmlKeyboardResponse,

                                            stimulus: jsPsych.timelineVariable('target'),

                                            choices: ['f', 'j'],

                                            trial_duration: 1500,

                                            post_trial_gap: 395,

                                            data: {

                                                task: 'trial',

                                                target: jsPsych.timelineVariable('target'),

                                                condition: jsPsych.timelineVariable('condition'),

                                                correct_response: jsPsych.timelineVariable('correct_response')

                                            },

                                            on_finish: function(data){

                                                data.correct = jsPsych.pluginAPI.compareKeys(data.response, data.correct_response);

                                            }

                                        };
Further Information
You can download the finished experiment from this tutorial here:
This tutorial only offers the basics of jsPsych. If you would like to know more please take a look at the official documentation or our workshop slides and our Gitlab repo